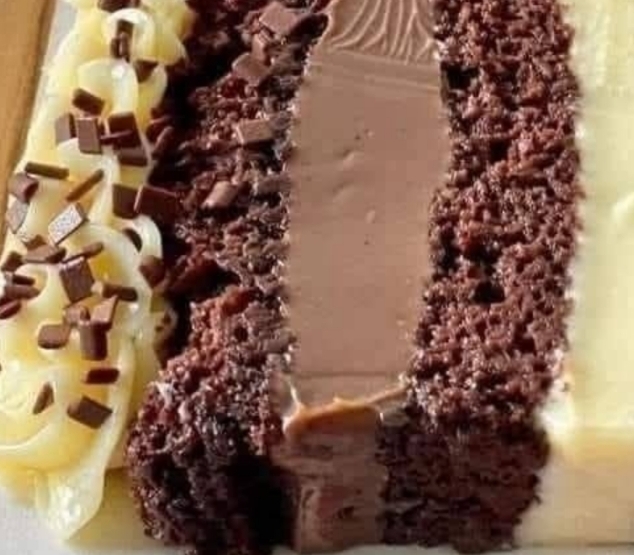
INGREDIENTS :
For the Chocolate Cake:
- 2 cups all-purpose flour
- 2 cups granulated sugar
- 3/4 cup unsweetened cocoa powder
- 2 teaspoons baking powder
- 1 1/2 teaspoons baking soda
- 1 teaspoon salt
- 1 cup buttermilk, at room temperature
- 1/2 cup vegetable oil
- 2 large eggs, at room temperature
- 2 teaspoons vanilla extract
- 1 cup boiling water
For the Creamy Filling:
- 1 cup heavy cream
- 1/2 cup powdered sugar
- 8 oz cream cheese, softened
- 1 teaspoon vanilla extract
For the Chocolate Ganache:
- 8 oz semisweet or dark chocolate, finely chopped
- 1 cup heavy cream
- 1 tablespoon unsalted butter (optional, for shine)
For the Vanilla or White Chocolate Frosting (Optional):
- 1/2 cup unsalted butter, softened
- 2 cups powdered sugar
- 1 teaspoon vanilla extract
- 2-3 tablespoons heavy cream
- 4 oz white chocolate, melted and cooled (optional)
INSTRUCTIONS :
Prepare the Chocolate Cake:
- Preheat your oven to 350°F (175°C). Grease and flour two 9-inch round cake pans.
- In a large mixing bowl, sift together the flour, sugar, cocoa powder, baking powder, baking soda, and salt.
- Add the buttermilk, vegetable oil, eggs, and vanilla extract. Beat on medium speed until well combined.
- Reduce the speed to low and carefully add the boiling water to the batter. Mix until the batter is smooth (it will be thin).
- Divide the batter evenly between the prepared pans.
- Bake for 30-35 minutes, or until a toothpick inserted into the center comes out clean.
- Let the cakes cool in the pans for 10 minutes, then turn them out onto a wire rack to cool completely.
Prepare the Creamy Filling:
- In a medium bowl, beat the cream cheese until smooth.
- Gradually add the powdered sugar and continue to beat until well combined.
- Add the heavy cream and vanilla extract, and beat until the mixture is light and fluffy.
- Chill in the refrigerator until ready to use.
Prepare the Chocolate Ganache:
- Place the chopped chocolate in a heatproof bowl.
- In a small saucepan, heat the heavy cream until it just begins to simmer.
- Pour the hot cream over the chocolate and let it sit for 2-3 minutes.
- Stir until the chocolate is completely melted and the mixture is smooth.
- Stir in the butter if using. Let the ganache cool slightly before using.
Prepare the Frosting (Optional):
- In a large bowl, beat the softened butter until creamy.
- Gradually add the powdered sugar and beat until smooth.
- Add the vanilla extract and heavy cream, and continue to beat until light and fluffy.
- If using, fold in the melted white chocolate until well combined.
Assemble the Cake:
- Place one layer of the chocolate cake on a serving plate.
- Spread the creamy filling evenly over the top.
- Place the second cake layer on top.
- Pour the chocolate ganache over the cake, allowing it to drip down the sides.
- If desired, pipe the frosting around the edges of the cake for decoration.
Here are some variations on details for your Strawberry Bombs:
- Filling Variations: You can try using different types of cheese for the filling, such as ricotta for a lighter texture or even flavored cream cheeses like strawberry or vanilla.
- Fruit Add-ins: Besides strawberries, consider adding other fruits like blueberries or raspberries to the filling for a mixed berry flavor. You could also use fruit preserves or purees for added sweetness.
- Texture Options: For a crunchier texture, mix in some finely chopped nuts or crushed pretzels into the filling or as a coating.
- Sweetness Levels: Adjust the sweetness of your filling by using honey or maple syrup instead of sugar, or even adding a pinch of salt to balance the flavors.
- Presentation Ideas: Serve your Strawberry Bombs in decorative cupcake liners or drizzle them with a flavored syrup, like a strawberry or chocolate sauce, for an appealing look.
Here are some tips for making and storing your Strawberry Bombs:
- Fresh Strawberries: Use ripe and fresh strawberries for the best flavor. Look for ones that are bright red and firm.
- Chill the Filling: If your filling is too soft, chill it in the refrigerator for about 30 minutes before filling the strawberries. This will make it easier to pipe into the strawberries.
- Coating Technique: When coating the bombs, make sure the coating is evenly distributed. You can use a fork to help roll them in the coating for better coverage.
- Storage: To store your Strawberry Bombs, place them in an airtight container lined with parchment paper to prevent sticking. They can be kept in the refrigerator for up to 3 days.
- Freezing: If you want to store them for longer, consider freezing them. Arrange the bombs on a baking sheet and freeze until solid, then transfer them to a freezer-safe container. They can last up to a month in the freezer.
To store your Strawberry Bombs, follow these steps:
- Cool Down: Make sure the Strawberry Bombs are completely cooled if you’ve just made them. This prevents condensation, which can make them soggy.
- Airtight Container: Place the Strawberry Bombs in an airtight container. You can line the bottom with parchment paper to prevent sticking.
- Refrigeration: Store the container in the refrigerator. They should stay fresh for about 3 days.
- Freezing Option: If you want to keep them longer, you can freeze them. Arrange the bombs on a baking sheet in a single layer and freeze until solid. Then, transfer them to a freezer-safe container. They can last up to a month in the freezer.

